We are pleased to announce a significant enhancement to useMango™: Loops. This innovative feature addresses the challenge of repetitive test steps, enabling a more streamlined and scalable approach to test automation. In this article, we will delve into the functionality of loops, the process of creating and executing loop-based tests, and how to analyze the comprehensive reports generated during test execution.
Getting Started
Prior to the introduction of loops, executing repetitive steps in useMango™ required either duplicating a series of actions multiple times within a test or creating a scripted component to perform the repetitive task. This approach not only increased effort but also added to the complexity and maintenance of tests.
With loops, repetitive steps can now be defined once and executed dynamically using varying data values for each iteration, eliminating redundancy and reducing maintenance burdens. In order to facilitate this, we have also included a new data type called “Table”, which enables us to store rows of data for loop iteration.
The looping functionality enables:
- Basic repetition of a series of steps (emulating a for loop using Loop Count).
- Iteration over rows of a table and passing the corresponding header values to the steps inside the loop (emulating a for each loop using Loop Table).
To get started, lets first add a loop to a test:
- Right-click on the line above or below the step where the loop is to be inserted.
- Select the “Add Loop” option from the context menu.
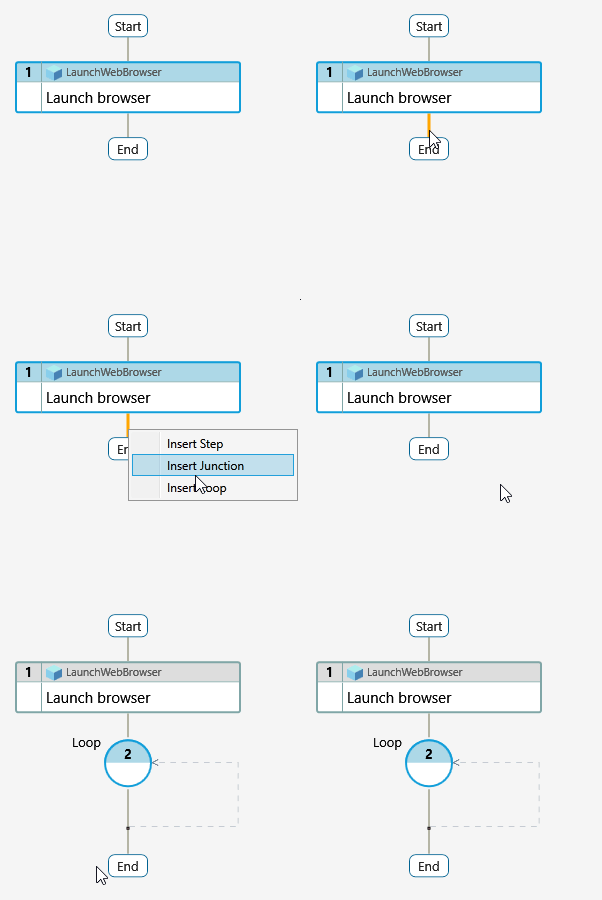
We can now add steps or junctions inside the loop.
Please note
Adding loops within loops is supported through composite components.
Now, let’s learn how to use the looping functionality with the following examples:
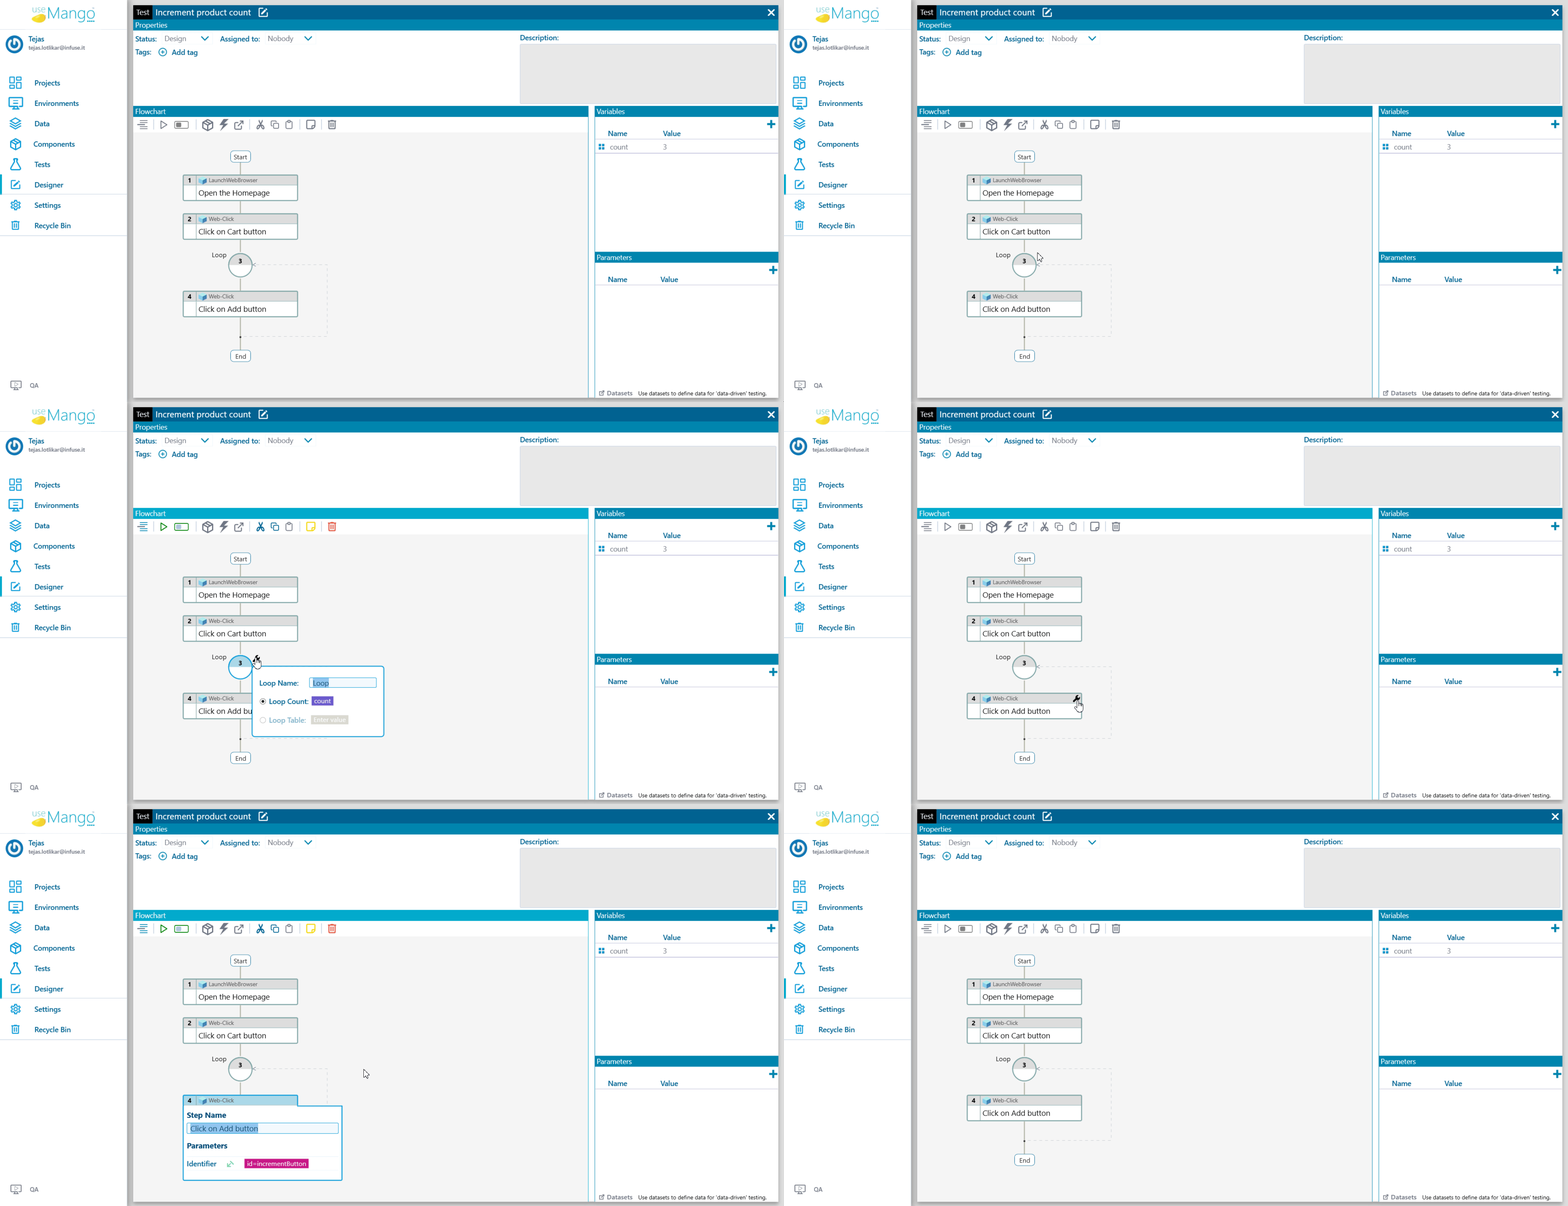
Consider a scenario of increasing the quantity of a product in a cart. The user needs to click on the “+” button multiple times to increase the quantity. Since this is repetitive task, this can be easily achieved by setting the Loop Count of the loop, much like a for loop.
Here’s how you can set it up:
- Create a text variable and give it a value (let’s say 3).
- Assign the variable to the Loop Count field.

- Add step to click on the “+“ button on the product.
- Add a step to verify that the quantity has been updated.
In this case, the loop runs for the 3 times, executing the steps in sequence. If any iteration fails (e.g., the quantity does not increase after clicking the + button), the loop terminates and is marked as failed.
Consider a scenario of testing the process of adding employees to a payroll application. Using a Loop Table, we can iterate over a set of data and use it to fill the employee details. This works similar to a for-each loop, executing the loop as many times as there are rows of data.
Before we set up the loop, let’s look at how we can add data from a CSV file to a table variable.
Let’s assume the tester wants to use the following CSV file:
First name,Last name,Email,Age,Salary,Department
Alice,Perry,alice@test.com,23,30000,IT
Bob,Smith,bob@test.com,36,40000,Finance- Creating a Table Variable: Click on the + icon in the variables pane. Choose Table from the types list. Click on Create.
Uploading a CSV file: Click on the Add Table icon and select the CSV file you wish to use. A preview will be shown in a dialog with the data in the CSV file as a Table. The headers in the Table data are called Table Headers. Confirm the preview by clicking on the Confirm button.
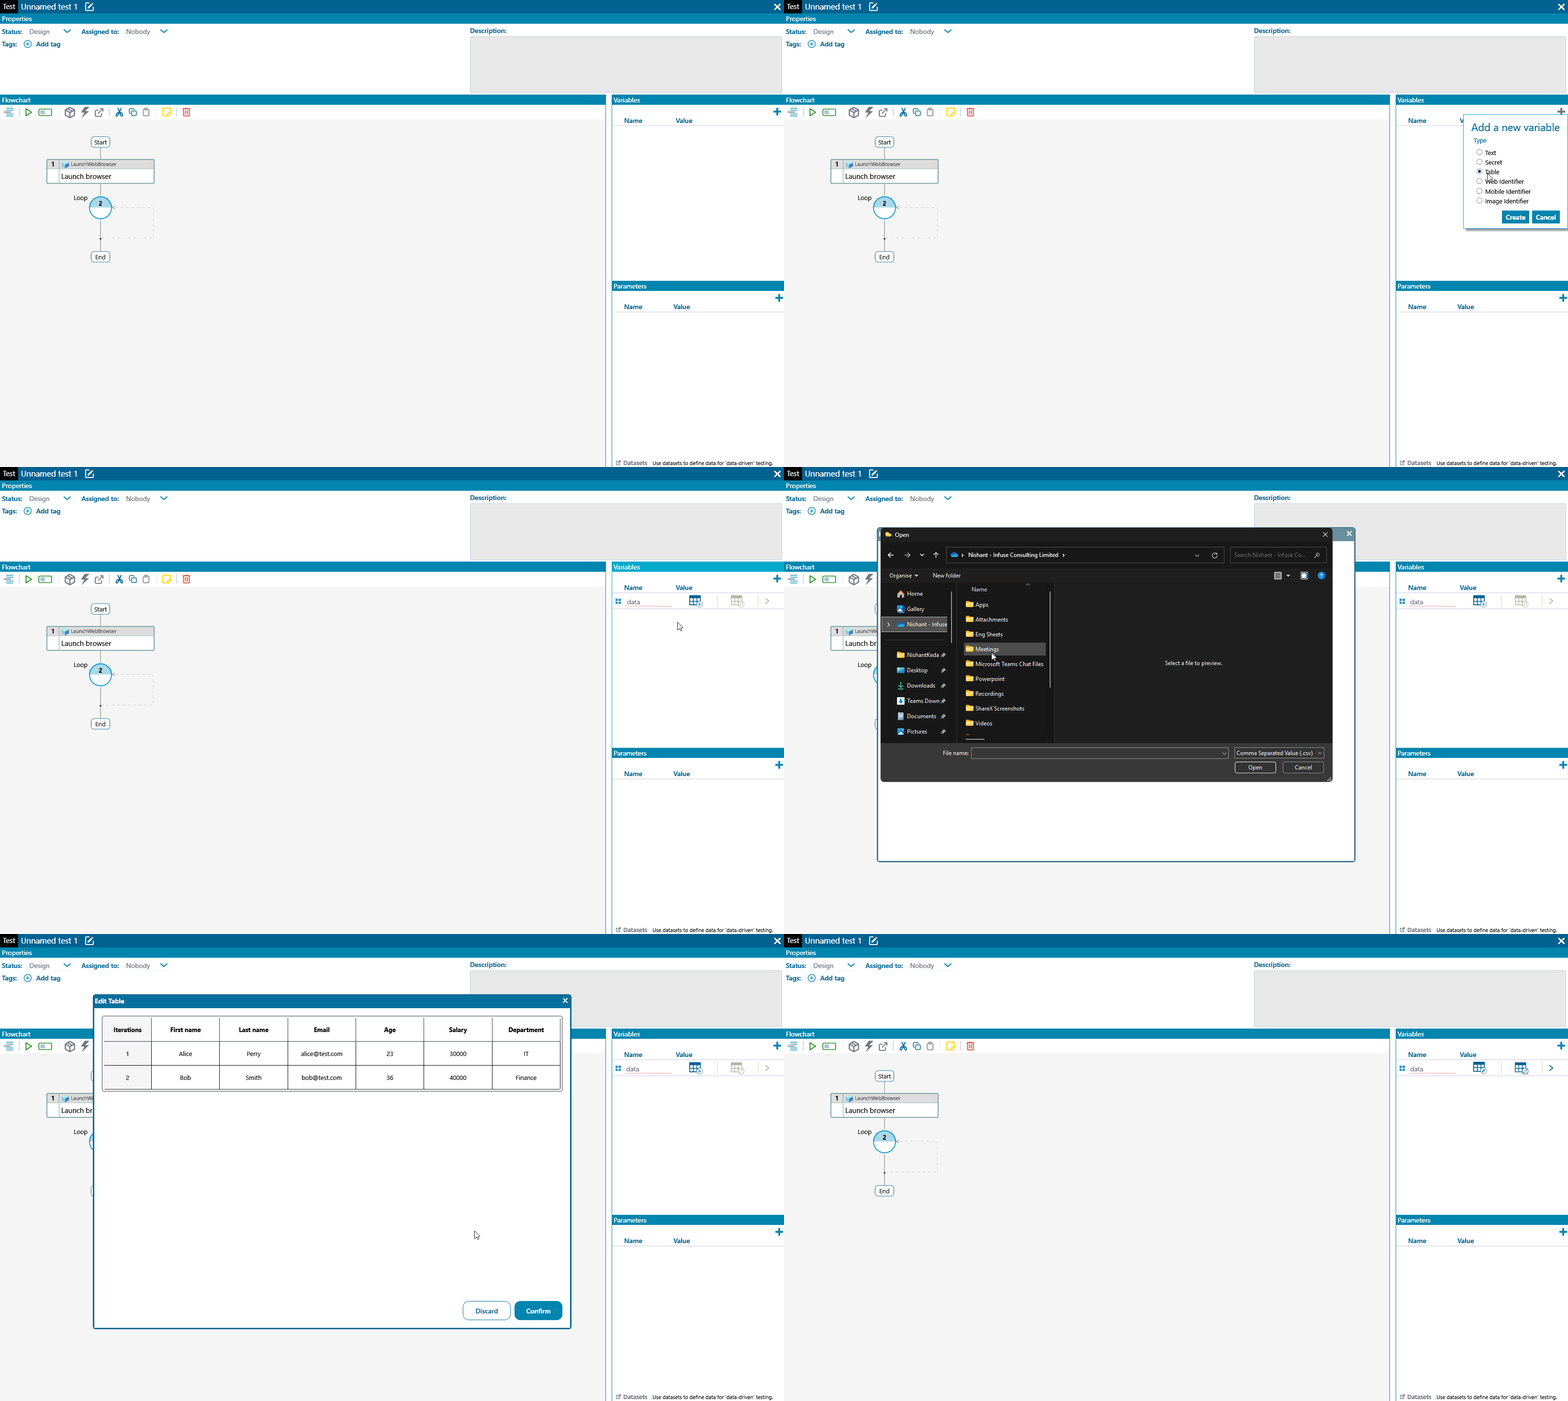
- Let’s now assign this newly created table variable to the Loop Table field.

- Add steps to enter the employee details to the form. We will be using the Table headers of the loop as input to the steps.
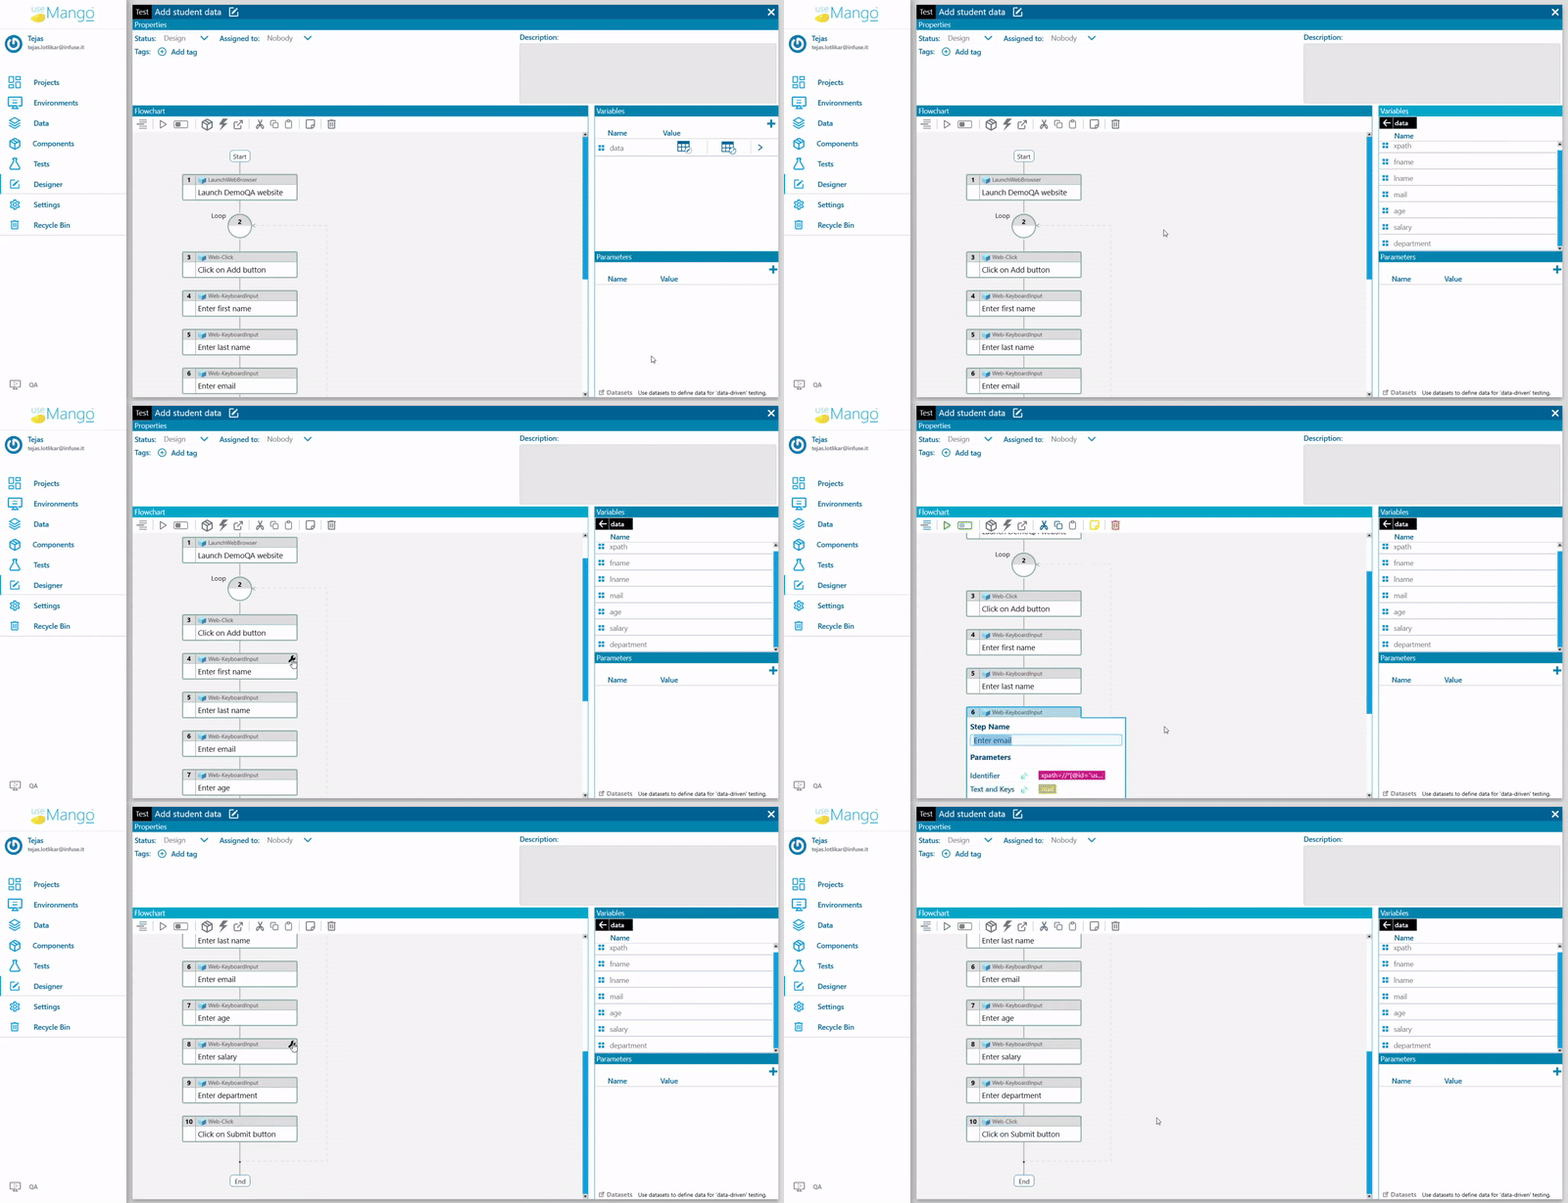
- Add a step to submit the form.
- Similarly, you can add a step to verify that the data entered has been added to the application.
In the first iteration, the loop uses Alice’s data (First name = Alice, Last name = Perry, email = alice@example.com, age = 23, salary = 30000, department = IT). In the second iteration, the loop uses Bob’s data.
You can read more about working with loops here.
Executing Tests with Loops
You can execute a test containing loops either from the Test Library or in the Test Designer.
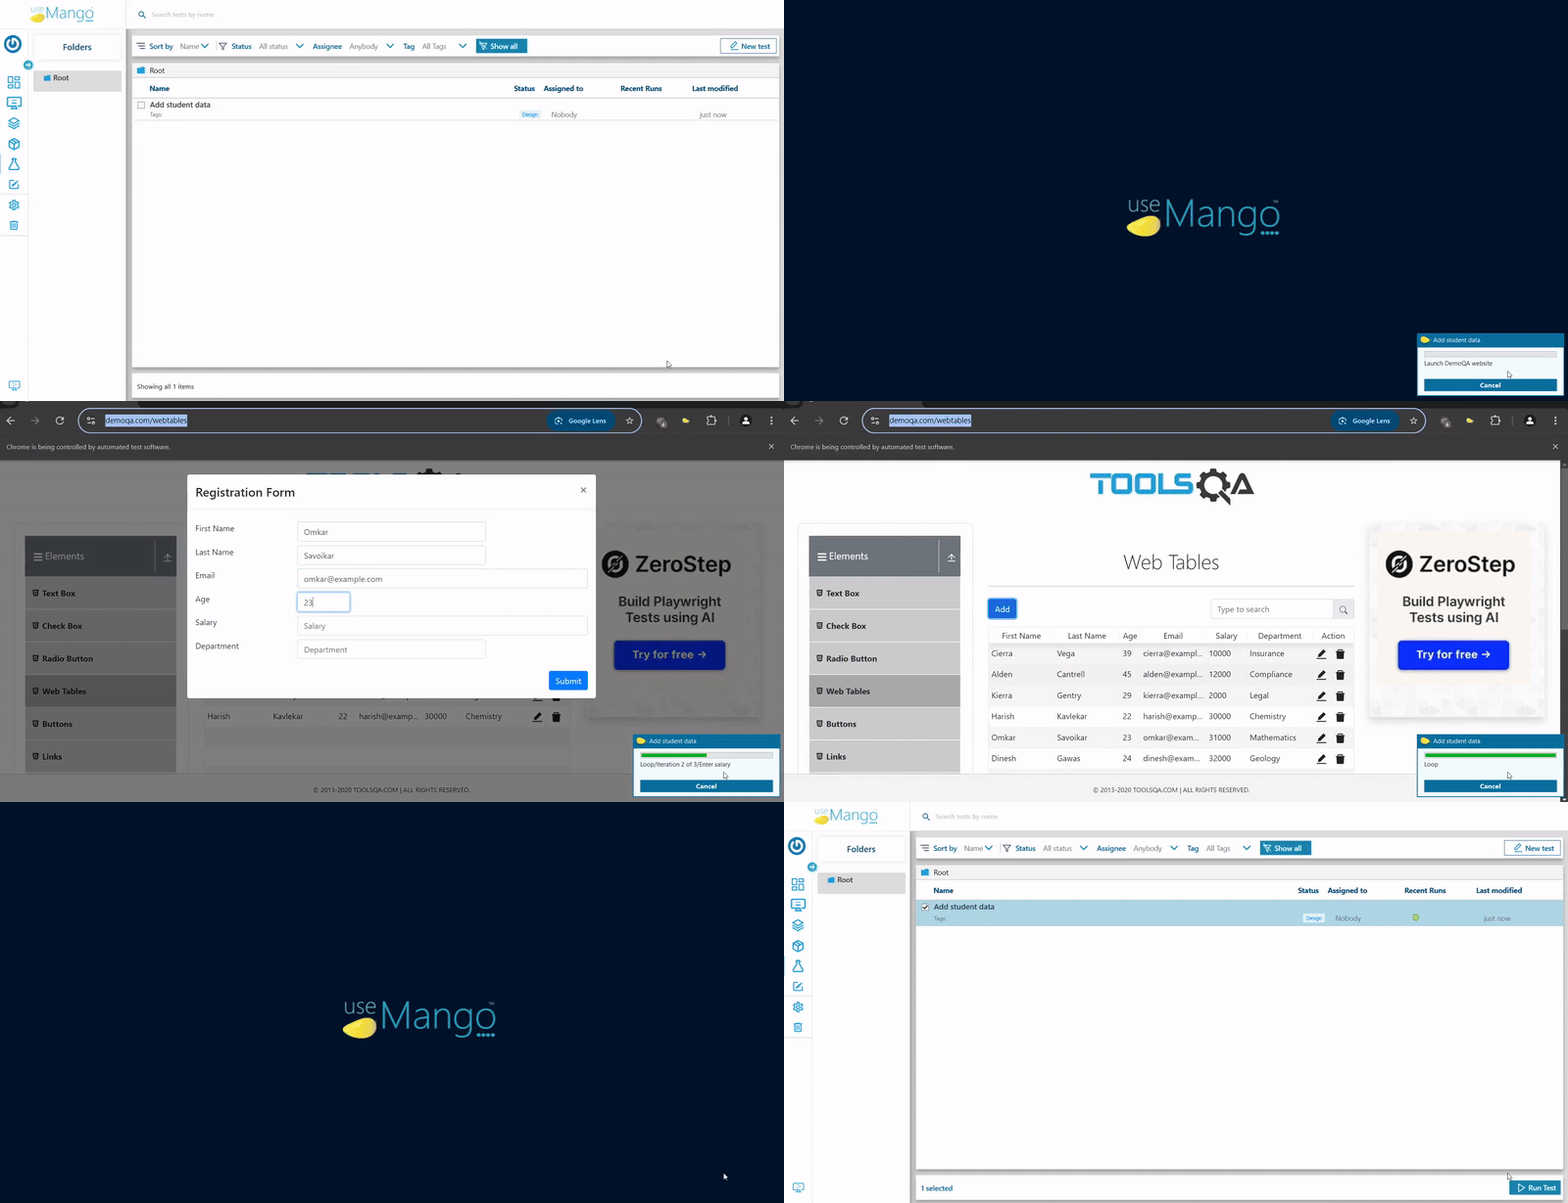
Illustration to execute a test containing a loop from Test library
Execution from Test Library
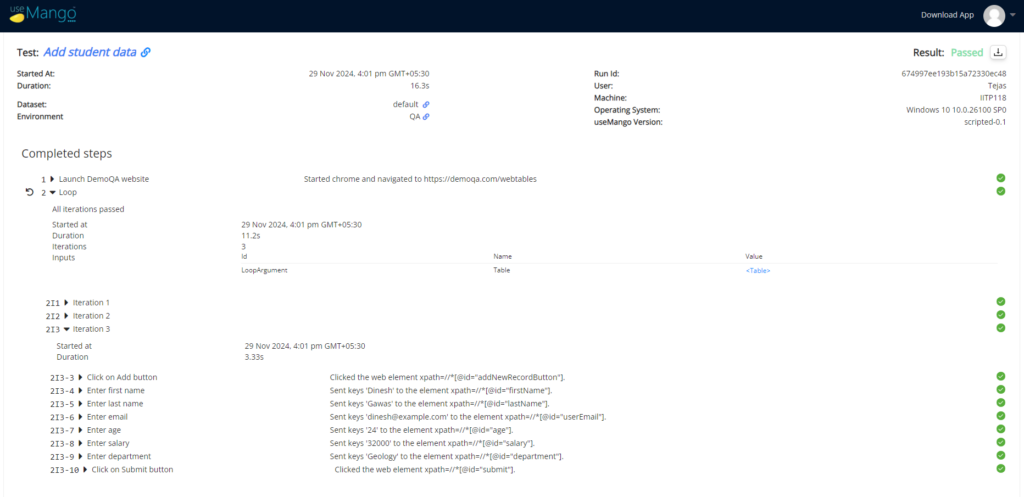
Once the Execution is completed, the user can click on the right-most Green/Red colored dot from the recent executions column of the test to access the Test Execution report.
If a table was used for the loop, it can be viewed by expanding the loop and clicking on the <Table> input displayed.
Each iteration can be seen and you can see each step executed by expanding the iterations.
Practical Applications of Loops
1. Processing Data Lists
Automate the processing of lists, such as assigning courses to students or updating employee records. Loops efficiently handle each item in the list without the need for repetitive test definitions.
2. Automated Data Entry
Streamline data entry tasks by iterating through rows in a spreadsheet, automatically populating fields in the system.
3. Form Data Validation
Validate multiple datasets by systematically testing each row of input data. Loops simplify the process by dynamically referencing the data during execution.
Conclusion
Loops in useMango™ bring unparalleled flexibility and efficiency to test automation. They simplify the process of handling repetitive steps, reduce redundancy, and improve test maintainability.
With the ability to input table data and review comprehensive reports, this feature empowers testers to build smarter, more scalable tests.
Get started with loops today and transform the way you automate tests in useMango™ !
